

How To Draw On Windows Movie Maker
Windows Movie Maker is dorsum: how to use Windows 10'south subconscious video editor
At that place's more than to the Photos app than meets the eye
Windows Movie Maker was simple, free video editing software that was last updated in 2012 and officially discontinued last year. Windows 8 and 10 launched without a video editing app, but following the Fall Creator'due south Update, at that place's now 1 included in the Microsoft Photos app – if you know where to expect.
in May 2017, Microsoft announced Story Remix – a new editor that would exist included with the Fall Creator'southward Update. Instead of just making elementary dwelling movies, Story Remix would allow users to combine video clips and photos with virtual 3D objects created in Remix 3D (opens in new tab).
Still, when the Windows ten Autumn Creator's Update rolled around, Story Remix had turned into a less ambitious tool much more than like the late Windows Movie Maker. It lets users organize media in a timeline, apply special effects and transitions, set the whole thing to music and add 3D animations (but not objects). Rather than releasing it on its ain as originally intended, Microsoft chose to add information technology to the existing Photos app.
Although its scope is somewhat narrower, it's a brilliant tool for anyone who wants to make a skillful looking video without mastering complicated software. Here's how to notice it and create a video from get-go to finish.

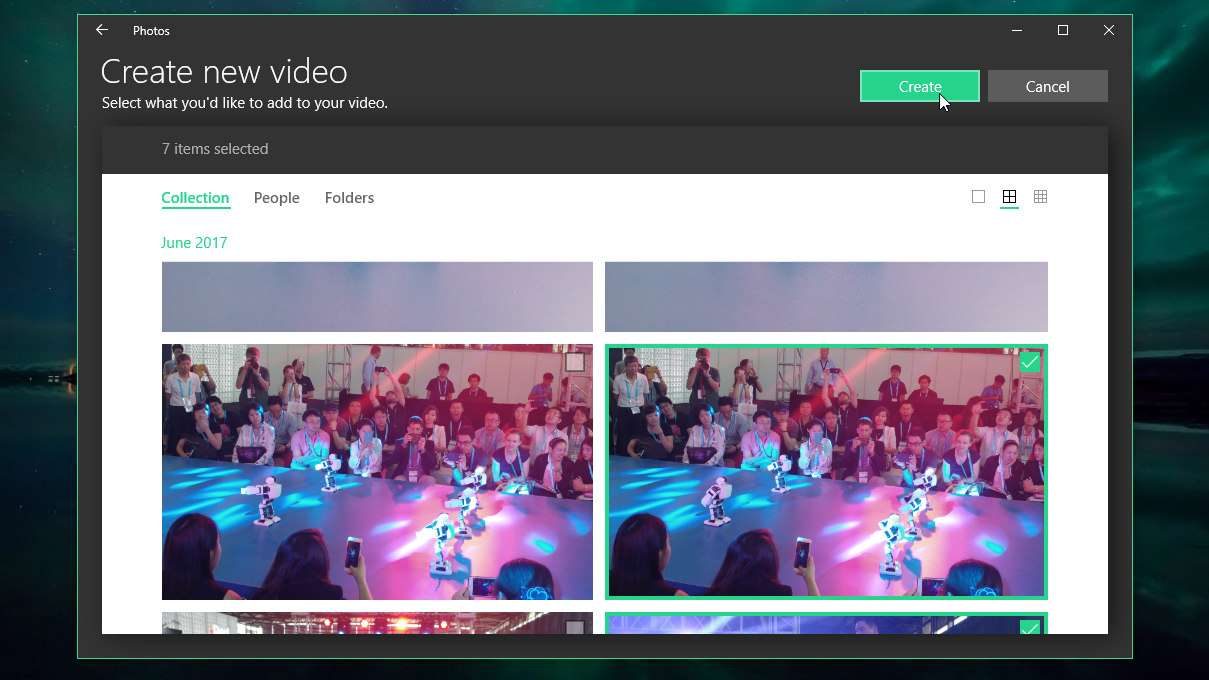
1. Choose your files
To add your photos and videos to the Photos app, select the 'Import' button from the elevation right, so choose either 'From a folder' or 'From a USB device' (such equally an external difficult drive, smartphone or photographic camera).
Select the folder you want to add together and click 'Add together this folder to Pictures'. Yous can't select private files to add, merely whatever new files yous add together to the connected folders will be imported to the Photos app automatically. Once that'due south done, click the light-green 'Create' button and cull 'Custom video with music'.
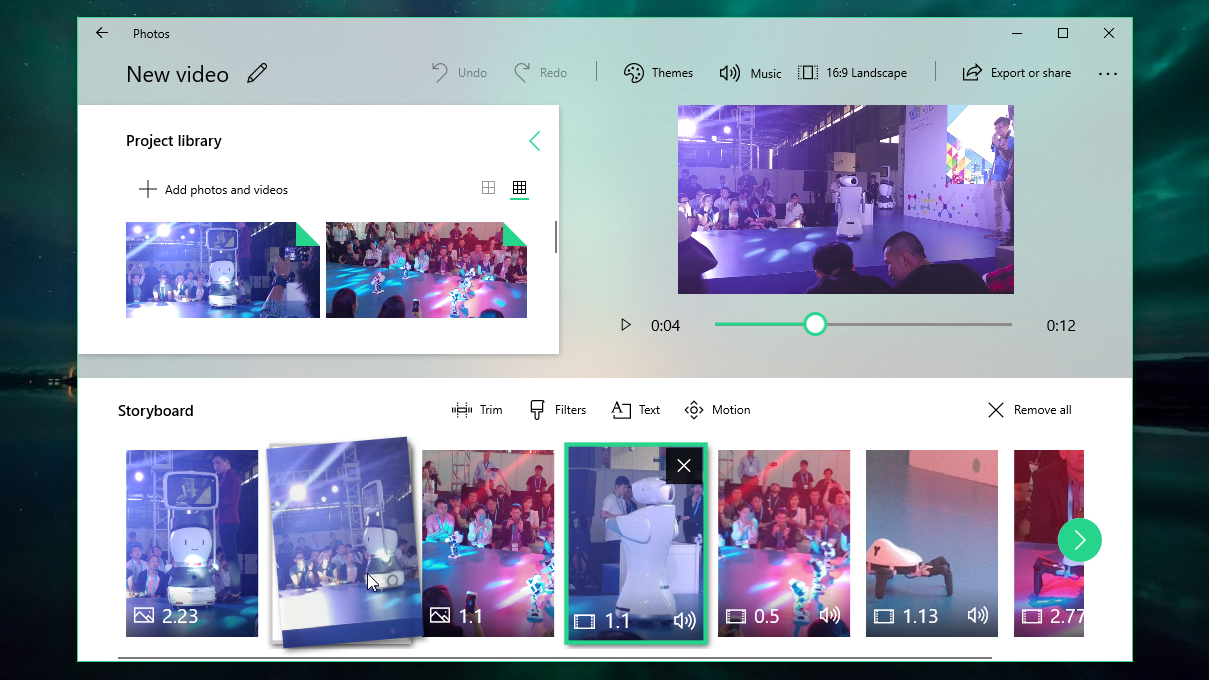
2. Arrange and trim video clips
Microsoft Photos will put together a simple moving-picture show automatically, complete with groundwork music. It volition even sync the photos so they're displayed in time with the beat. You tin can preview it using the player at the pinnacle right. Don't worry if the playback is choppy; it will be smooth when information technology'due south finally rendered and exported.
To rearrange the media files, just drag and drop them to a new position in the Storyboard at the bottom.
If a video clip is also long, select information technology in the Storyboard and click 'Trim'. Cull a start and an end signal for the clip by dragging the rectangular markers, then select 'Done'. To preview the clip, position the circular playback marker, then click the 'Play' button on the left.
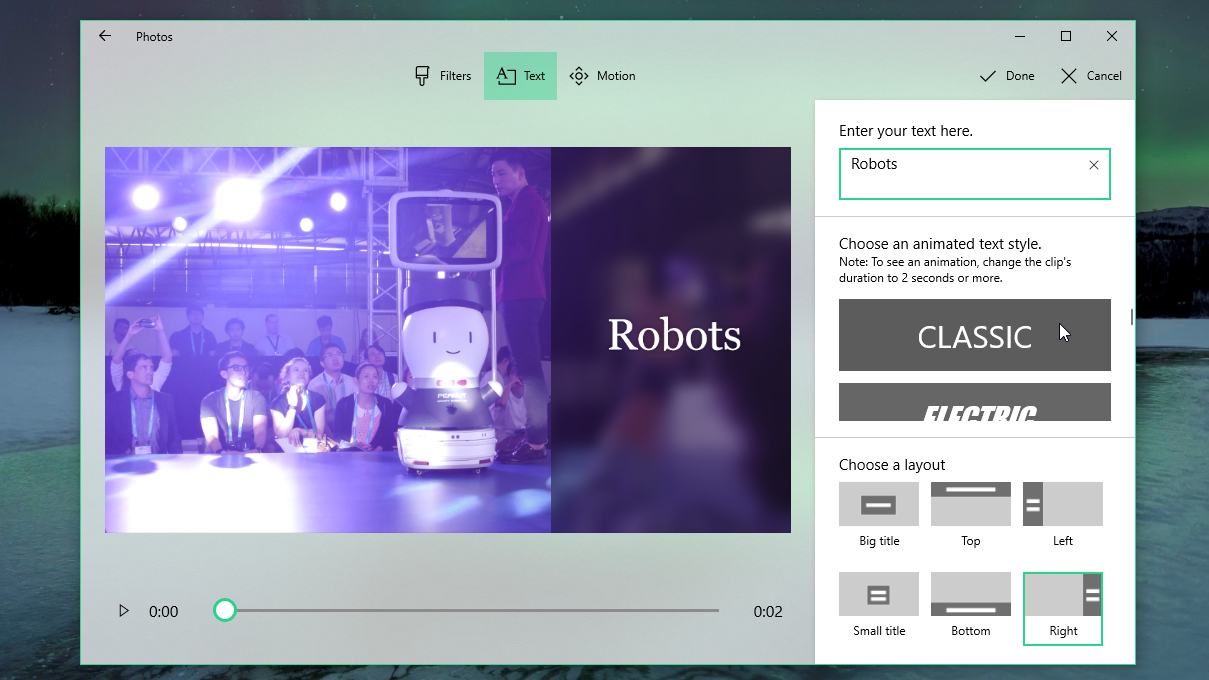
three. Add titles and motion furnishings
To add together titles or captions to your video, click a video clip or photo, then select 'Text' from the menu in a higher place the Storyboard. Blazon your text into the box at the pinnacle right and it will appear in the preview window, automatically resized to fit the space. If the video clip is at least two seconds long, the text will be animated when it appears. Select a style from the list on the right (unfortunately these aren't customizable), then choose a position. When y'all've finished, click 'Done'.
The 'Motion' options (in the menu to a higher place the Storyboard) add together some interesting panning and zooming effects that are particularly effective for still photos. Select a frame from the Storyboard, then click the icon and cull a mode.
As earlier, you can preview the effect using the small 'Play' button on the left, then confirm your pick by clicking 'Done'. Editing in the Photos app is non-destructive, and so you lot can go back change effects subsequently if you change your listen.
4. Apply filters and 3D effects
To give your video a totally new look, select 'Themes' from the meridian menu. Each theme will add dissimilar music to your video, with appropriately styled titles. The app will automatically adjust how long photos are shown to sync with the music.
In that location are besides Instagram-fashion filters to add a affect of way to your video. Click a video clip or photo, so select the 'Filters' icon and cull an option. All the presets have a vintage look, and sadly aren't customizable, merely at that place's quite a wide selection. Brand your choice, and so click 'Done' to confirm it.
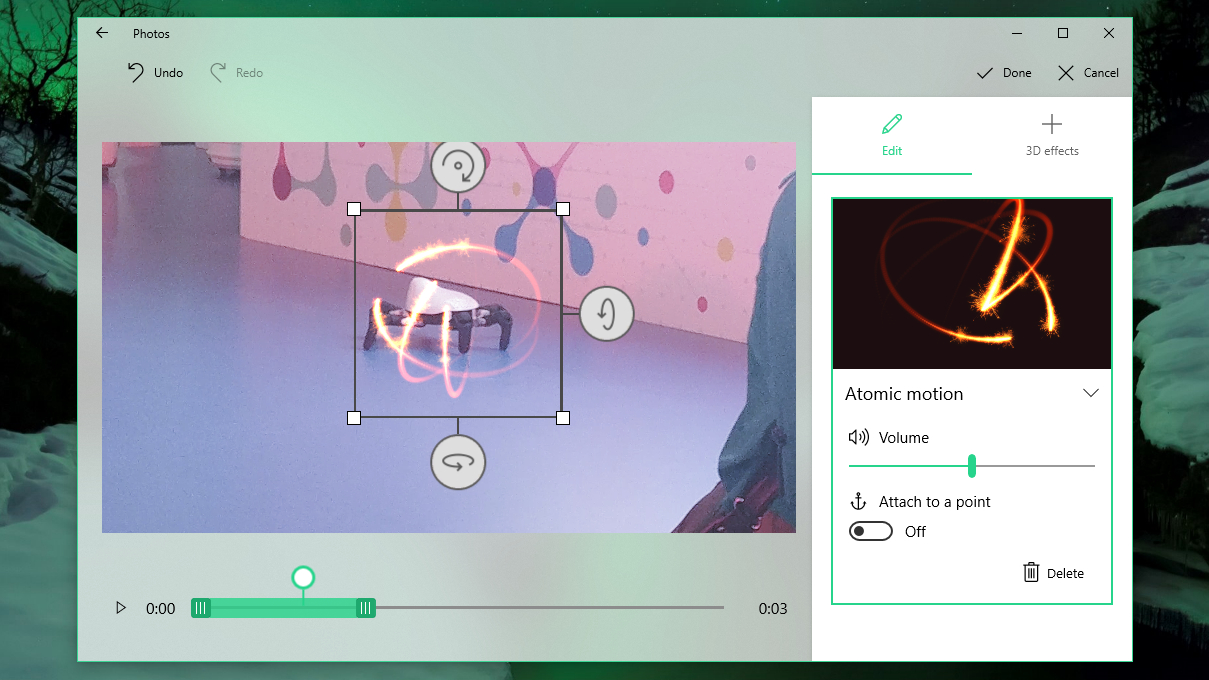
To make things even more than special, select '3D effects'. These are fun particle effects that you tin apply to draw attention to something in your video. Subtle ones are unremarkably the nigh constructive, just they're fully customizable then you lot tin tone down the more dramatic ones. Move the green slider nether the preview window to cull when the effect should appear, and use the arrows to adjust its angle and management.

five. Change the music
Similarly, clicking the 'Music' tab will allow y'all select a new soundtrack for your video, and sync your video'due south content automatically. You can choose one of the built-in songs or pick 1 from your PC, simply bear in mind that you shouldn't employ copyright-protected music in videos you're going to publish online.
If you demand some suitable tunes, take a expect at BenSound (opens in new tab). Songs here are available under a generous Creative Commons license for non-commercial employ, provided you lot link back to the site when posting your video. Check out the total license details (opens in new tab).
If the sound in any of your video clips is too loud and drowns out the music, right-click the clip and select 'Volume' to plow it downwards or mute it.
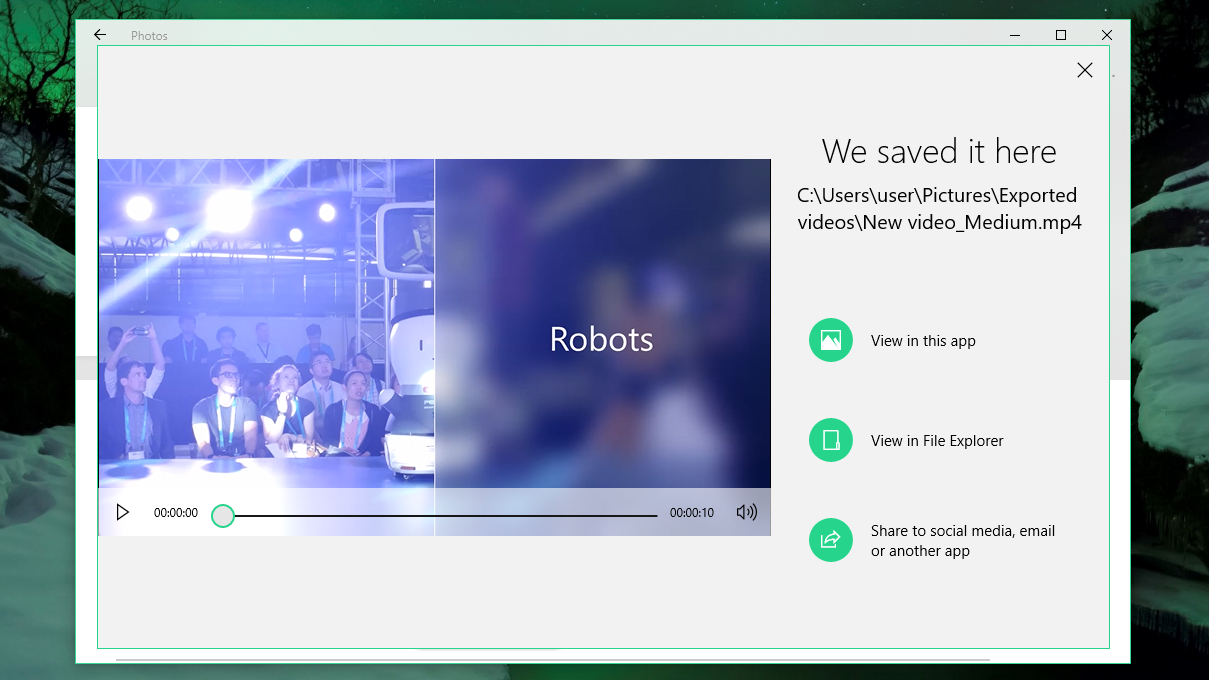
When you're washed, select 'Consign or share' from the top menu and pick a size option – small-scale, medium or large. Your option will determine the motion-picture show quality, merely you can't set the resolution or frame rate manually. The video will and then be rendered (which might take a while depending on your hardware), encoded in MP4 format and saved in your Pictures folder.
Once that's done, click 'Share' and select an option: copy the file, share it using the Mail app, ship information technology via Skype, or upload it to YouTube or OneNote.
- Check out our guide to the best video converters
VSDC Free Video Editor (opens in new tab) is a feature-packed non-linear suite that can compete with even expensive video editing software. There are no extra programs bundled in the installer – merely the occasional prompt to upgrade to the premium edition.
With VSDC you lot tin can create video projects from a combination of video clips, still images and audio files, with a resolution of up to i,980 x 1,080 (full Hd) and a maximum frame rate of 30fps. There's likewise a born screen capture tool for recording video and taking still images from your desktop – ideal for software reviews and tutorials. VSDC also offers an extensive range of video and audio filters, plus stylish transitions.
Y'all tin consign finished projects in a diversity of formats, with handy ready-made profiles for pop devices. VSDC also provides a way to burn your project onto DVD – a feature rarely available in free video editors.

Cat is the editor of TechRadar's sis site Advnture. She's a UK Athletics qualified run leader, and in her spare fourth dimension enjoys zippo more than lacing up her shoes and hitting the roads and trails (the muddier, the better)
Source: https://www.techradar.com/how-to/windows-movie-maker-is-back-how-to-use-windows-10s-hidden-video-editor
Posted by: mcmurraymompok40.blogspot.com
0 Response to "How To Draw On Windows Movie Maker"
Post a Comment