

How To Change Storage Location On Windows 10
1 of the most frustrating parts of having a small SSD defended to your Windows operating organization is the fact that some software installers simply won't give yous the option of installing exterior of the primary drive.
At that place are fifty-fifty some applications that allow you to store your installation data on a secondary drive but notwithstanding place temporary or enshroud files on the primary bulldoze. For anyone interested in keeping their main drive squeamish and tidy, this can exist a major issue.
Spotify is 1 of the many Windows applications that you'll eventually discover taking up a whole mess of space. This is due to the manner Spotify locally caches your data so that you aren't constantly re-streaming music off of their servers. Information technology serves as a way for Spotify to save bandwidth and instantly evangelize your music without needing to buffer.
However, this comes at a price for those of us trying to salve precious disk infinite. Not anybody tin can afford to have several gigabytes of local Spotify data on their master drive, and the skilful news is that there's a way around it. Let's talk about how you can motion Spotify'southward local cache data to a new location within Windows.
How to Alter the Location of Spotify Information in Windows
To perform this task, we're going to utilise something chosen a symbolic link or directory junction. A directory junction effectively creates a mirror of your information at one file path but actually stores the information in some other.
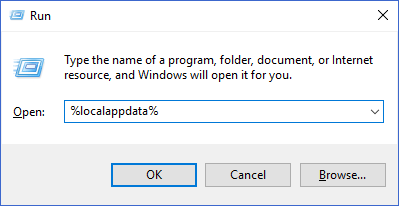
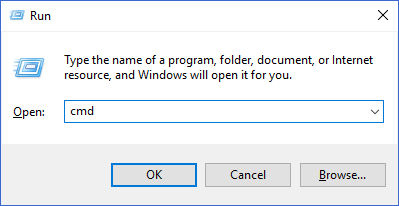
The beginning thing we're going to need to practise is to find exactly where our Spotify's data folder really is. To do so, printing the Windows + R keys to bring up a Run prompt. Here, blazon in "%localappdata" and press Enter.
This should bring up a Windows Explorer window of the AppData\Local folder within your Windows user profile location. In this list of files, discover the Spotify folder and open up information technology.
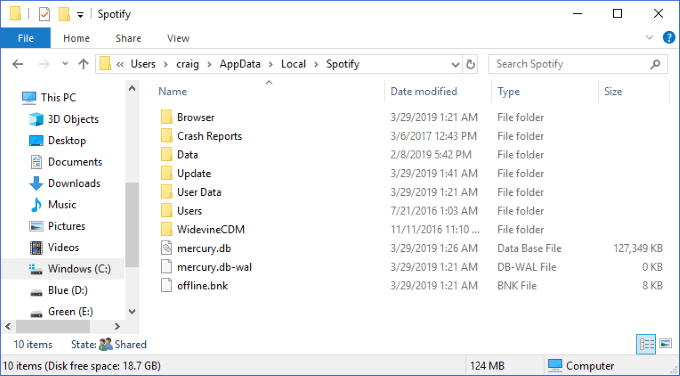
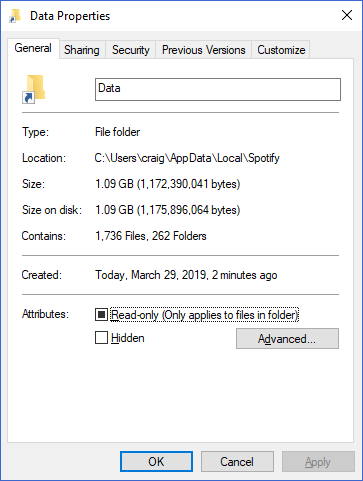
The Data binder inside is what contains all of your cached music information. Y'all may desire to right-click on it and select Properties to see how large this folder is. Is it then big that yous'd similar to motility it off of your current drive and onto another? Great! That's what we're going to exercise next.
The start step is to be sure that Spotify is non currently running on your auto. Later making certain that it's closed, yous want to select the Data binder and press the Ctrl + C keys to copy it.
Next, bring up a second Windows Explorer window of the location where you want to move your Spotify data. At that location, press Ctrl + Five to paste the binder.
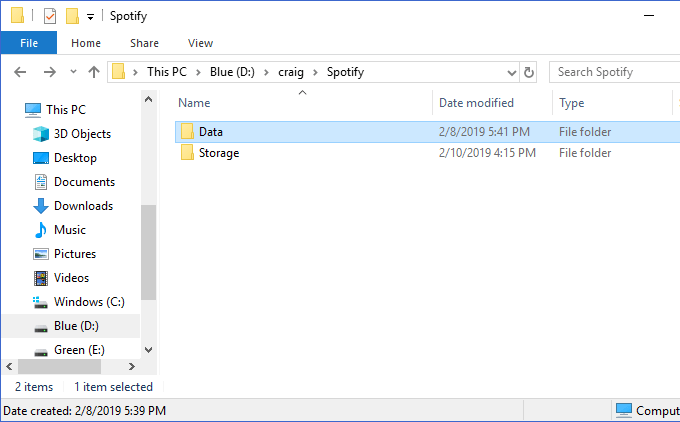
Above, you can see that I've created a new location to store my data at D:\craig\Spotify. The pasted Data folder here contains the contents of that aforementioned binder in C:\Users\craig\AppData\Local\Spotify.
Next, exist certain that the two folders are identical. Expect within both of them to see that you've fully copied all of the files properly. Once complete, go back to the original Spotify folder location (in our first Windows Explorer window at AppData\Local), select the Data folder that we but copied, and hit the Delete key to delete it.
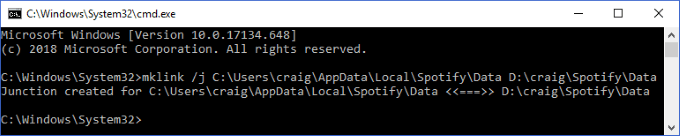
Side by side, we're going to create a directory junction so that your new Data binder points to where the old i once was. To do then, press the Windows + R keys to once again bring up the Run prompt. Type in "cmd", but exist sure to press Ctrl + Shift + Enter (instead of just Enter)—this runs the prompt every bit Administrator.
This is where we'll begin to create our directory junction. You desire to type in the following control: mklink /j <link> <target>, where <link> is the path to the original binder (that we're recreating) and <target> is the path to the new binder (that nosotros've pasted).
In my example above, I'd run this command: mklink /j C:\Users\craig\AppData\Local\Spotify D:\craig\Spotify
Information technology's important to enclose the binder paths in quotation marks if they contain a space.
Yous'll see a success message after the directory junction has been created. Y'all should also encounter that the Data folder at present appears again at our original location, this time with the minor "shortcut" icon at the bottom-left corner.
That's it! At present, when you play music in Spotify, it will notwithstanding enshroud that information in the original binder at your link location. However, the directory junction will automatically move it to the new location and "mirror" information technology at the original location.
For those of you who utilise Spotify on a daily basis, years of regular use can crusade this folder to swell to a massive size. With this simple directory junction trick, yous can store all of that information in any folder on any drive.
All-time of all is that this same procedure can be useful in many other useful scenarios—cheque out how nosotros apply a symbolic link to sync folders to Dropbox and OneDrive!
Do not share my Personal Information.
Source: https://www.online-tech-tips.com/computer-tips/how-to-change-the-location-of-spotifys-local-storage-in-windows/
Posted by: mcmurraymompok40.blogspot.com
0 Response to "How To Change Storage Location On Windows 10"
Post a Comment